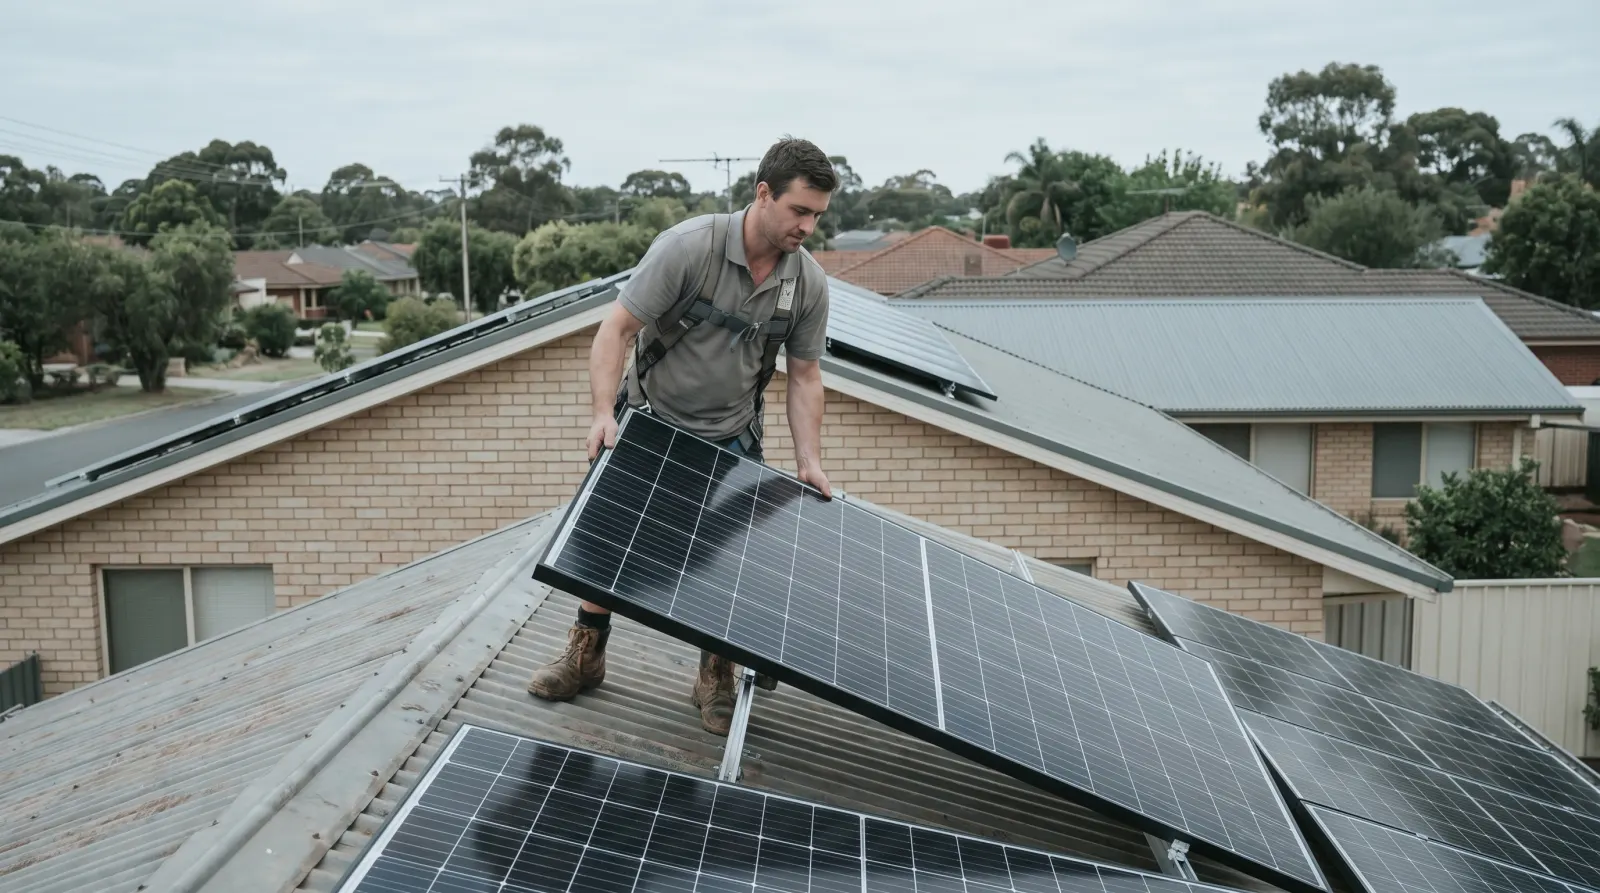
Critical Warning: Poor Installation Costs
Poor rooftop solar installation can cost you R50,000-R150,000+ in repairs, replacements, and roof damage. In South Africa's challenging climate with intense UV, hail, and wind, installation quality directly determines system longevity and performance.
This guide reveals the 15 most common installation mistakes we've documented across thousands of South African installations-and exactly how to prevent them. Whether you're planning an installation or verifying existing work, this checklist could save you from catastrophic failures.
Why Proper Rooftop Solar Installation Matters in South Africa
South Africa's rooftop solar market has exploded since load shedding intensified in 2023-2024. With over 500,000 residential solar installations completed by 2026, the quality gap between professional and substandard installations has become painfully evident.
The stakes are high: A properly installed rooftop solar system should last 25+ years with minimal maintenance. Poor installation can lead to roof leaks within months, electrical fires, system underperformance of 30-50%, voided warranties, and insurance claim rejections.
South African Installation Challenges
- Extreme weather: UV radiation 30% higher than Europe, hailstorms, 120km/h+ winds
- Diverse roof types: Tiles, IBR, Klip-Lok, thatch-each requires specific techniques
- Older housing stock: Many roofs 20-40+ years old with questionable structural integrity
- Regulatory complexity: Municipal requirements, Eskom grid compliance, SANS standards
The rush to capitalize on load shedding demand has flooded the market with inexperienced installers. Many lack electrical qualifications, use substandard materials, and skip critical steps to maximize profit margins. The result: a growing crisis of failed installations requiring expensive remediation.
Before we dive into specific mistakes, understand this: proper rooftop solar installation requires structural engineering knowledge, electrical expertise, waterproofing skills, and understanding of local regulations. It's not a DIY project or job for general handymen.
Mistake 1: Inadequate Roof Structural Assessment
The Problem: Many installers eyeball roof strength without proper structural assessment. Solar panels add 15-20kg per square meter-a 5kW system adds 300-400kg total load. Older roofs, especially those with previous repairs or water damage, may not support this additional weight.
Why It Happens: Structural assessments cost R3,000-R8,000 and add time to the project. Unscrupulous installers skip this step to offer lower quotes and faster turnaround. They gamble that roofs will hold-until they don't.
How to Prevent This Mistake
- 1. Demand a structural assessment: Insist on evaluation by a qualified structural engineer, especially for roofs 15+ years old
- 2. Get a structural certificate: This document is essential for insurance and warranty purposes
- 3. Check for warning signs: Sagging roof lines, cracked tiles, water stains on ceilings, visible truss damage
- 4. Consider roof type: Tiled roofs and IBR sheeting require different assessments than concrete slabs
- 5. Factor in wind loads: Coastal and highveld areas experience higher wind forces requiring stronger mounting
Cost of Prevention vs. Repair: Structural assessment costs R3,000-R8,000. Roof collapse repairs cost R80,000-R200,000+. The math is clear.
Mistake 2: Poor System Sizing and Undersizing
The Problem: Installers size systems based on budget rather than actual energy needs. A homeowner consuming 30kWh daily gets quoted a 5kW system because "that's what fits the budget"-then discovers it only covers 40% of their usage during load shedding.
Undersizing is rampant in South Africa's price-sensitive market. Installers know customers shop on price, so they propose smaller systems to win quotes. The result: disappointed homeowners who still rely heavily on Eskom and can't expand easily due to poor initial planning.
Common Undersizing Scenarios
- Scenario 1: 3kW system for a 4-bedroom home with geyser, pool pump, and home office (needs 8-10kW minimum)
- Scenario 2: 5kWh battery for 30kWh daily consumption (needs 15-20kWh for meaningful backup)
- Scenario 3: No consideration for future EV charging, heat pump, or family growth
- Scenario 4: System sized for summer consumption, inadequate for winter heating loads
How to Prevent This Mistake
- 1. Conduct proper load analysis: Review 12 months of municipal bills to understand seasonal variations
- 2. Use our sizing calculator: Complete system sizing guide with South African examples
- 3. Plan for growth: Size for 120-150% of current consumption to accommodate future needs
- 4. Consider load shedding goals: Full backup requires 2-3x daily consumption in battery storage
- 5. Get multiple quotes: Compare sizing recommendations from 3-5 installers
- 6. Verify calculations: Ask installers to show their sizing methodology and assumptions
The Expansion Trap: Adding capacity later costs 30-50% more than installing correctly initially. Inverter upgrades, additional mounting structures, and electrical modifications add up quickly. Our system design guide helps you plan for scalability from day one.
Mistake 3: Ignoring Roof Orientation and Shading Analysis
The Problem: Installers mount panels on the most convenient roof section without analyzing sun exposure, shading patterns, or optimal orientation. In South Africa, north-facing roofs receive maximum sun-yet we regularly see systems installed on east or west-facing roofs simply because "that's where there's space."
Even worse: ignoring shading from trees, chimneys, satellite dishes, or neighboring buildings. A single shaded panel can reduce string output by 30-80% depending on inverter technology. Morning shade from a tree that "doesn't look like a problem" can cost you 20% annual production.
Optimal Orientation for South African Rooftops
- North-facing (ideal): 100% production potential, receives sun from sunrise to sunset
- Northeast/Northwest: 90-95% production, slight morning or afternoon bias
- East/West-facing: 75-85% production, significant morning or afternoon losses
- South-facing: 60-70% production, only viable for specific use cases or with optimizers
- Tilt angle: 25-30° optimal for most of SA, matches latitude for year-round performance
How to Prevent This Mistake
- 1. Demand shading analysis: Professional installers use tools like Solar-Log, PVsyst, or drone surveys
- 2. Observe throughout the day: Visit your roof at 9am, noon, and 3pm to see shading patterns
- 3. Consider seasonal changes: Trees with leaves, sun angle variations between summer and winter
- 4. Use optimizers if needed: SolarEdge or Tigo optimizers minimize shading impact (add R800-R1,200 per panel)
- 5. Prioritize north-facing space: Even if it means fewer panels, north-facing produces more than cramming panels on poor orientations
- 6. Plan for tree trimming: Budget R2,000-R8,000 for professional tree trimming if needed
Real Impact: A Cape Town installation we audited had 12 panels on an east-facing roof with morning tree shade. Annual production: 4,200kWh. After relocating 8 panels to an available north-facing section and trimming trees, production increased to 6,800kWh-a 62% improvement for R15,000 in modifications.
Mistake 4: Incorrect Panel Mounting and Spacing
The Problem: Mounting structures are the foundation of your solar system, yet many installers cut corners with inadequate rail spacing, wrong fastener types, or improper grounding. Panels mounted too close together overheat, reducing efficiency by 10-15%. Insufficient mounting points lead to wind damage.
South Africa's wind conditions are severe-coastal areas experience 100km/h+ winds regularly, and highveld summer storms bring destructive gusts. Panels must be secured to withstand these forces. We've documented dozens of cases where panels lifted off roofs during storms due to inadequate mounting.
Common Mounting Mistakes
- Too few mounting points: Minimum 4 points per panel required, many installers use 2-3
- Wrong fasteners: Using wood screws instead of structural bolts, no washers or sealant
- Insufficient rail support: Rails spanning 2+ meters without intermediate support
- No expansion allowance: Aluminum rails expand/contract with temperature-must allow movement
- Panels touching: Zero gap between panels causes overheating and cleaning difficulties
- Mixed mounting systems: Combining incompatible rail systems voids warranties
How to Prevent This Mistake
- 1. Verify mounting system quality: Insist on branded systems like Schletter, K2, or Clenergy-avoid generic Chinese rails
- 2. Check spacing: Minimum 10-15mm gap between panels for airflow and thermal expansion
- 3. Confirm mounting points: 4+ secure points per panel, properly sealed and flashed
- 4. Inspect fasteners: Stainless steel bolts with washers, not wood screws or cheap alternatives
- 5. Verify wind rating: Mounting system must be rated for your area's wind zone (check SANS 10160-3)
- 6. Ensure proper tilt: Panels should be tilted 25-30° for optimal performance and self-cleaning
Cost Implications: Quality mounting systems cost R300-R600 per panel. Cheap alternatives save R100-R200 per panel but risk R50,000+ in wind damage, roof repairs, and panel replacements. Professional installers never compromise on mounting-it's the most critical structural element.
Mistake 5: Substandard Waterproofing and Roof Penetrations
The Problem: Every roof penetration for mounting bolts is a potential leak point. Poor waterproofing is the #1 cause of post-installation problems in South Africa. We've documented hundreds of cases where homeowners discovered ceiling leaks months after installation-by which time water damage has already occurred.
The issue is exacerbated by South Africa's intense summer rains. A small gap around a mounting bolt can channel water into roof cavities, leading to rot, mold, and structural damage. Repairs often cost R15,000-R40,000 and require removing panels to access the roof.
Waterproofing by Roof Type
- Tiled roofs: Require tile hooks or specialized brackets that don't penetrate tiles, sealed with flexible sealant
- IBR/corrugated: Must use specialized IBR brackets with rubber seals, never drill through valleys
- Klip-Lok: Clamps attach to ribs without penetration, no drilling required
- Concrete/flat: Ballasted systems preferred, penetrations require waterproof membranes
- Thatch: Requires specialized mounting on supporting structure, not thatch itself
How to Prevent This Mistake
- 1. Insist on proper flashing: Every penetration must have metal or rubber flashing, not just sealant
- 2. Use quality sealants: Sikaflex, Alcolin, or equivalent-not cheap silicone that degrades in UV
- 3. Minimize penetrations: Good installers use shared mounting points and strategic placement
- 4. Verify roof-specific methods: Different roof types require different waterproofing approaches
- 5. Request waterproofing warranty: Separate from equipment warranty, should cover leaks for 5-10 years
- 6. Inspect after first rain: Check ceiling for stains or moisture within days of installation
Red Flag: If your installer doesn't discuss waterproofing methods specific to your roof type, or says "we just use sealant," find another installer. Professional companies have detailed waterproofing protocols and offer separate waterproofing warranties.
Mistake 6: Improper Cable Management and Routing
The Problem: Cables exposed to UV, routed through sharp edges, bundled too tightly, or inadequately secured degrade rapidly. South Africa's intense UV radiation destroys non-UV-rated cables within 2-3 years. We've seen cables that look like they've been chewed by rats-actually UV damage.
Poor cable management also creates fire risks. Cables rubbing against roof edges can wear through insulation, causing short circuits. Undersized cables overheat under load. Improperly terminated connections create high-resistance points that spark and burn.
Cable Management Failures
- UV exposure: Non-rated cables disintegrate within 24-36 months, requiring complete rewiring
- Undersized cables: Using 4mm² where 6mm² required causes voltage drop and overheating
- Poor routing: Cables draped across roof without support, subject to wind damage
- Sharp edges: Cables routed over roof edges or through holes without grommets
- Inadequate conduit: Using cheap PVC conduit that cracks in sun, or no conduit at all
- Mixed cable types: Combining solar-rated DC cables with standard AC cables
How to Prevent This Mistake
- 1. Verify cable specifications: Must be UV-rated, double-insulated solar cable (e.g., Helukabel PV1-F)
- 2. Check cable sizing: Use our cable sizing calculator or verify against SANS 10142-1 requirements
- 3. Inspect routing: Cables should be secured every 30-50cm, protected in conduit where exposed
- 4. Verify MC4 connectors: All DC connections must use proper MC4 connectors, crimped not twisted
- 5. Check conduit quality: UV-stabilized PVC or metal conduit, properly sealed at entry points
- 6. Ensure separation: DC and AC cables must be separated to prevent interference
Cost of Rewiring: Complete cable replacement costs R8,000-R20,000 depending on system size. Quality cables cost only R15-R25 per meter more than cheap alternatives-a R2,000-R4,000 difference on a typical installation. Choose wisely.
Mistake 7: Inadequate Inverter Placement and Ventilation
The Problem: Inverters generate significant heat and must be installed in well-ventilated locations away from direct sun and moisture. Yet we regularly see inverters mounted in direct sunlight, in enclosed cupboards, or in garages with poor airflow. Overheating reduces efficiency by 10-20% and shortens inverter lifespan by years.
South African summer temperatures reach 35-40°C in many areas. An inverter in direct sun can reach 70-80°C internally-well above the 45-50°C maximum operating temperature. This triggers thermal derating or shutdowns, exactly when you need maximum solar production.
Ideal Inverter Placement
- Location: Cool, dry, well-ventilated area away from direct sunlight
- Temperature: Ambient temperature should stay below 30°C year-round
- Clearance: Minimum 30cm on all sides for airflow, 50cm+ for larger inverters
- Mounting height: Eye level (1.5-1.8m) for easy access to display and controls
- Protection: IP65 rating minimum if installed outdoors, shaded by eave or cover
- Accessibility: Easy access for maintenance, monitoring, and emergency shutoff
How to Prevent This Mistake
- 1. Choose location carefully: Garage wall (not in sun), utility room, or shaded exterior wall
- 2. Ensure ventilation: Never install in enclosed cupboards or poorly ventilated spaces
- 3. Add shade if needed: Install shade cloth or roof overhang for outdoor inverters
- 4. Consider distance: Minimize cable run from panels (voltage drop) and batteries (efficiency)
- 5. Plan for battery placement: Batteries should be near inverter but in even cooler location if possible
- 6. Verify IP rating: Outdoor inverters need IP65 rating minimum for weather protection
Real Impact: A Pretoria installation had a Sunsynk 8kW inverter mounted on a north-facing exterior wall in full sun. Summer derating reduced output to 5.5kW during peak hours. After relocating to a shaded garage wall (cost: R2,500), the system operated at full capacity-recovering the relocation cost in 4 months through increased production.
Mistake 8: Skipping Professional Electrical Certification
The Problem: In South Africa, all electrical work must be certified by a registered electrician who issues a Certificate of Compliance (CoC). Yet many "solar installers" are not qualified electricians and either skip certification entirely or forge documents. This is illegal, voids insurance, and creates serious safety risks.
Without a valid CoC, your installation is not compliant with SANS 10142-1 standards. If there's a fire or electrical incident, insurance will deny claims. If you sell your property, the lack of CoC can delay or derail the sale. Municipal grid-tie approvals require valid CoCs.
Consequences of Missing CoC
- Insurance voidance: Claims denied for electrical fires or damage
- Legal liability: Homeowner liable for injuries or damage from non-compliant installation
- Property sale issues: Buyers can demand CoC or reduce offer price
- Municipal penalties: Fines up to R10,000 for non-compliant grid-tied systems
- Warranty voidance: Manufacturers void warranties without proper electrical certification
- Retrofit costs: Bringing non-compliant systems up to code costs R15,000-R40,000+
How to Prevent This Mistake
- 1. Verify electrician registration: Ask for Wireman's License or Electrical Contractor Registration number
- 2. Confirm CoC inclusion: CoC must be included in quote, not an "optional extra"
- 3. Check registration online: Verify electrician registration on Department of Employment and Labour website
- 4. Get CoC before final payment: Never make final payment until you receive the original CoC document
- 5. Verify CoC authenticity: CoC must have unique number, electrician details, and official stamp
- 6. Keep CoC safe: Store original with property documents-you'll need it for insurance and property sales
Red Flag: If an installer says "CoC is not necessary for off-grid systems" or "we can arrange CoC later," walk away. All electrical installations in South Africa require CoC regardless of grid connection. This is non-negotiable. See our installer selection guide for what to check.
Mistake 9: Using Low-Quality or Mismatched Components
The Problem: The solar market is flooded with cheap, unbranded components from questionable suppliers. Some installers mix premium panels with budget inverters, or pair high-voltage batteries with incompatible inverters. Component mismatches reduce efficiency, create safety risks, and void warranties.
We've documented cases where installers used 48V batteries with 51.2V inverters (voltage mismatch causes charging issues), mixed panel brands with different voltage characteristics (string mismatch reduces output), or installed "Tier 1" panels that are actually rebranded Chinese no-names.
Common Component Mismatches
- Voltage incompatibility: Battery voltage doesn't match inverter requirements
- Panel string mismatch: Mixing different wattage or voltage panels in same string
- Oversized arrays: Panel capacity exceeds inverter maximum input
- Battery chemistry mix: Mixing LiFePO4 and lithium-ion batteries
- Cable undersizing: Cables rated for lower current than system produces
- Breaker mismatch: Circuit breakers rated incorrectly for system specifications
How to Prevent This Mistake
- 1. Verify component compatibility: Check manufacturer compatibility lists before purchasing
- 2. Insist on quality brands: Tier 1 panels (JA Solar, Jinko, Canadian Solar), reputable inverters (Sunsynk, Deye, Victron)
- 3. Check battery compatibility: Use manufacturer-recommended batteries or verified compatible brands
- 4. Verify panel matching: All panels in a string should be identical model and wattage
- 5. Request datasheets: Review technical specifications to confirm compatibility
- 6. Avoid "too good to be true" prices: Premium components have market prices-deep discounts indicate fakes or B-grade stock
Quality vs. Price: A system with quality components costs 15-25% more upfront but lasts 25+ years with minimal issues. Cheap components fail within 3-5 years, requiring replacements that cost more than the initial savings. Our quotation guide helps you evaluate component quality in quotes.
Mistake 10: Neglecting Future Expansion Planning
The Problem: Most homeowners underestimate future energy needs. They install a 5kW system today, then want to add an EV charger, heat pump, or home office next year-only to discover their system can't expand easily. Inverter at maximum capacity, no space for more panels, electrical panel maxed out.
Expansion after the fact costs 30-50% more than planning ahead. You may need a larger inverter (R15,000-R40,000), additional mounting structures (R8,000-R15,000), electrical panel upgrades (R5,000-R12,000), and potentially new batteries if current bank is incompatible with expansion.
Future-Proofing Considerations
- EV charging: Adds 7-15kWh daily consumption, requires 7kW+ inverter capacity
- Heat pump: Replaces geyser, adds 3-5kWh daily but reduces overall consumption
- Pool pump: Adds 5-10kWh daily depending on size and run time
- Home office: Adds 3-8kWh daily for computers, monitors, air conditioning
- Family growth: Additional people increase consumption by 5-10kWh per person
- Appliance upgrades: Newer appliances often use more power (larger fridges, more electronics)
How to Prevent This Mistake
- 1. Plan for 150% capacity: If you need 5kW today, install 7-8kW to accommodate growth
- 2. Choose expandable inverters: Hybrid inverters that support parallel operation or battery expansion
- 3. Leave roof space: Don't fill every available space-leave room for 30-50% more panels
- 4. Size electrical panel: Ensure DB board has capacity for future circuits
- 5. Plan battery expansion: Choose battery systems that support easy capacity additions
- 6. Document for future: Keep system diagrams, specifications, and expansion options on file
Smart Expansion Strategy: Install a larger inverter than currently needed (costs R5,000-R10,000 more), leave mounting rails with empty positions (costs R2,000-R4,000 more), and choose parallel-capable batteries (no additional cost). Total extra investment: R7,000-R14,000. Cost to retrofit later: R30,000-R60,000+.
Mistake 11: Poor Grounding and Lightning Protection
The Problem: South Africa has one of the highest lightning strike rates globally, especially in the highveld. Solar systems on rooftops are prime lightning targets. Inadequate grounding and surge protection can result in complete system destruction from a single strike-losses of R100,000-R200,000+.
Many installers skip proper grounding to save costs or lack knowledge of SANS 10142-1 grounding requirements. They connect panels to roof structure without proper earth stakes, or use inadequate surge protection devices. When lightning strikes, the surge travels through the system destroying inverters, batteries, and connected appliances.
How to Prevent This Mistake
- 1. Install proper earth stakes: Minimum 2x earth stakes, 1.5m+ deep, resistance below 10 ohms
- 2. Use Type 1+2 surge protection: DC surge protection on panel strings, AC surge protection on inverter output
- 3. Ground all metal components: Mounting rails, panel frames, inverter chassis must be bonded to earth
- 4. Install lightning arrestors: Consider lightning arrestors for high-risk areas (R3,000-R8,000)
- 5. Test grounding resistance: Professional testing should confirm <10 ohm resistance
- 6. Document grounding: Grounding details must be included in CoC
Surge Protection Investment: Full surge protection costs R5,000-R12,000 depending on system size. This includes DC surge arrestors (R2,000-R4,000), AC surge protection (R1,500-R3,000), and proper grounding (R1,500-R5,000). Compare this to R100,000+ in potential lightning damage-it's essential insurance.
Mistake 12: Ignoring Municipal Regulations and Grid Compliance
The Problem: Each South African municipality has different requirements for solar installations, especially grid-tied systems. Some require pre-approval, others require notification within 30 days. Some mandate specific inverter settings, others require isolation switches. Ignoring these requirements can result in fines, forced disconnection, or legal action.
The regulatory landscape is complex and changing. Eskom's NRS 097-2-3 standard governs grid-tied systems, but municipalities add their own requirements. Cape Town, Johannesburg, and Tshwane have different processes. Some areas ban grid export, others allow it with special meters.
Municipal Requirements by Major City
- Cape Town: Registration required for systems >1kW, approval for grid-tied, bidirectional meter for export
- Johannesburg: Notification within 30 days, CoC required, no pre-approval for <1MW
- Tshwane: Application required for grid-tied, approval takes 4-8 weeks, specific inverter settings
- eThekwini: Registration for systems >3.5kW, CoC and single-line diagram required
- Ekurhuleni: Notification required, anti-islanding protection mandatory, CoC essential
How to Prevent This Mistake
- 1. Research local requirements: Contact your municipality before installation to understand requirements
- 2. Confirm installer knowledge: Installer should be familiar with your municipality's specific requirements
- 3. Get required approvals: Submit applications and wait for approval before installation if required
- 4. Configure inverter correctly: Grid-tied inverters must meet NRS 097-2-3 settings for your area
- 5. Install required safety devices: Isolation switches, anti-islanding protection, visible disconnects
- 6. Keep documentation: Retain all approval letters, CoC, and compliance documentation
Consequences of Non-Compliance: Municipalities can fine you R5,000-R20,000, force system disconnection, or refuse to process future building applications. In extreme cases, non-compliant grid-tied systems that cause grid issues can result in liability for damages. Always ensure full compliance before energizing your system.
Mistake 13: Inadequate Monitoring System Setup
The Problem: Many installers skip monitoring system setup or configure it incorrectly. Without proper monitoring, you can't detect underperformance, identify failing components, or fine-tune energy usage. A system producing 30% below expected output might go unnoticed for months, costing thousands in lost production.
Modern inverters include monitoring capabilities, but they must be properly configured with WiFi/4G connectivity, correct system parameters, and alert thresholds. We've seen countless systems where monitoring was never set up, or homeowners received login credentials that don't work.
What Good Monitoring Should Show
- Real-time production: Current solar generation, battery state, grid import/export
- Historical data: Daily, weekly, monthly production trends and comparisons
- System health: Component status, error codes, performance metrics
- Energy flow: Visual representation of energy sources and consumption
- Alerts: Notifications for system faults, underperformance, or grid issues
- Financial tracking: Savings calculations, payback progress, ROI metrics
How to Prevent This Mistake
- 1. Verify monitoring setup: Test monitoring app/portal before installer leaves
- 2. Confirm connectivity: Ensure WiFi or 4G dongle is working and system is online
- 3. Set up alerts: Configure email/SMS alerts for system faults or underperformance
- 4. Review baseline performance: Installer should show you expected production levels
- 5. Get training: Understand how to read monitoring data and identify issues
- 6. Check regularly: Review monitoring data weekly to catch problems early
Monitoring Value: A Cape Town homeowner noticed their system production dropped 25% over two weeks via monitoring. Investigation revealed a failed panel string. Early detection allowed warranty replacement before damage spread. Without monitoring, the issue might have gone unnoticed for months, voiding warranty and costing R15,000+ in repairs.
Mistake 14: Choosing Installers Based on Price Alone
The Problem: Solar installation is the second-largest home investment after property purchase for many South Africans. Yet countless homeowners choose installers based solely on having the lowest quote. They ignore qualifications, experience, references, and component quality-then suffer the consequences.
The cheapest quote is cheap for a reason: unqualified labor, substandard components, shortcuts on safety and quality, no proper insurance, or the installer is desperate for work. A R20,000 saving on a R150,000 system means nothing if you spend R50,000 fixing problems within a year.
How Low Quotes Hurt You
- Unqualified installers: No electrical license, no insurance, disappear after installation
- Fake components: Counterfeit panels, refurbished inverters, B-grade batteries
- Safety shortcuts: No grounding, poor waterproofing, undersized cables
- No warranty support: Installer vanishes, leaving you with no recourse for failures
- Hidden costs: Quote excludes CoC, mounting hardware, or essential components
- Poor workmanship: Rushed installation, untrained labor, no quality control
How to Prevent This Mistake
- 1. Get 3-5 detailed quotes: Compare scope, components, warranties, and qualifications
- 2. Verify credentials: Check electrical registration, insurance, SAPVIA membership
- 3. Request references: Contact 3-5 recent customers, visit completed installations
- 4. Compare component quality: Ensure quotes specify exact brands and models
- 5. Understand inclusions: CoC, mounting, monitoring, commissioning should be included
- 6. Check reviews: Google, HelloPeter, Facebook reviews reveal installer reputation
- 7. Meet the team: Meet actual installers who will do the work, not just salespeople
- 8. Verify insurance: Installer must have public liability and professional indemnity insurance
Price vs. Value: Quality installers charge R12,000-R16,000 per kW installed (including components). Quotes below R10,000/kW are red flags. Our installer selection guide shows how to check qualifications, insurance, and track record.
Mistake 15: Skipping Post-Installation Testing and Commissioning
The Problem: Many installers finish physical installation, flip the switch, and leave-without proper testing and commissioning. They don't verify system performance, check for errors, tune settings, or train homeowners. Problems emerge weeks later when the installer is harder to reach.
Professional commissioning includes performance testing, safety verification, settings optimization, monitoring setup, and homeowner training. This process takes 2-4 hours but ensures the system operates correctly and safely. Skipping it is like buying a car and driving off without checking if everything works.
Proper Commissioning Checklist
- Performance testing: Verify actual output matches expected production
- Safety checks: Test grounding, surge protection, isolation switches
- Settings optimization: Configure inverter for your usage patterns and tariffs
- Monitoring setup: Connect and verify monitoring system functionality
- System documentation: Provide manuals, warranties, system diagrams
- Homeowner training: Explain operation, monitoring, maintenance, troubleshooting
- CoC issuance: Provide Certificate of Compliance and electrical test results
How to Prevent This Mistake
- 1. Require commissioning in contract: Specify detailed commissioning process in installation agreement
- 2. Withhold final payment: Pay final 10-20% only after commissioning is complete
- 3. Request test results: Insist on documented performance and safety test results
- 4. Get training: Spend time with installer learning system operation and maintenance
- 5. Verify monitoring: Confirm monitoring shows expected production before installer leaves
- 6. Receive documentation: Get all manuals, warranties, CoC, and system diagrams before final payment
Commissioning Value: Proper commissioning identifies 15-30% of installation issues before they become problems. A Durban installation revealed incorrect inverter settings during commissioning that would have reduced battery life by 40%. Correction took 10 minutes-but would have cost R30,000+ in premature battery replacement if undetected.
How to Verify Your Installation Was Done Correctly
Even with a reputable installer, you should verify installation quality. Here's a full checklist to assess your rooftop solar installation:
Installation Verification Checklist
Structural & Mounting (Score: /10)
- Panels securely mounted with 4+ attachment points each
- 10-15mm gaps between panels for airflow
- Mounting rails properly supported, no sagging
- All fasteners are stainless steel with washers
- Panels tilted at 25-30° for optimal performance
Waterproofing (Score: /10)
- All roof penetrations properly flashed
- Quality sealant used (Sikaflex or equivalent)
- No visible gaps around mounting points
- Roof-specific waterproofing methods used
- Waterproofing warranty provided separately
Electrical Work (Score: /10)
- UV-rated solar cables used throughout
- Cables properly secured and protected in conduit
- All DC connections use proper MC4 connectors
- Cables sized correctly for system capacity
- No exposed or damaged cable insulation
Inverter & Equipment (Score: /10)
- Inverter in cool, ventilated location
- 30cm+ clearance on all sides
- Mounted at eye level for easy access
- Protected from direct sun and rain
- Display visible and functioning
Safety & Compliance (Score: /10)
- Certificate of Compliance provided
- Proper grounding with earth stakes installed
- Surge protection devices installed
- Isolation switches accessible and labeled
- System meets municipal requirements
Monitoring & Documentation (Score: /10)
- Monitoring system configured and online
- Alerts set up for system faults
- All manuals and warranties provided
- System diagram and specifications documented
- Training provided on system operation
Scoring Guide:
- 55-60 points: Excellent installation, professional work
- 45-54 points: Good installation, minor issues to address
- 35-44 points: Concerning quality, demand corrections
- Below 35: Poor installation, consider independent audit
Red Flags: Signs of Poor Rooftop Solar Installation
Recognize these warning signs that indicate substandard installation requiring immediate attention:
Critical Red Flags
Immediate Concerns
- Ceiling leaks or water stains after rain
- Burning smell from inverter or electrical panel
- Frequent inverter shutdowns or error codes
- Panels loose or moving in wind
- No Certificate of Compliance provided
Performance Issues
- Production 30%+ below expected levels
- Battery not charging or draining quickly
- Monitoring system not working or offline
- Inverter overheating and derating
- Visible cable damage or exposed wiring
If you observe any critical red flags, immediately contact your installer and document issues with photos. If the installer is unresponsive, consider hiring an independent solar auditor (R3,000-R8,000) to assess installation quality and provide a remediation report.
Can Lightning Damage Your Solar Panels? Surge Is the Real Risk
No, panels do not attract lightning. Neither the panels nor their aluminium mounting rails make your house a bigger target-a strike is driven by the height and position of the structure, not by what sits on the roof. The real danger is surge: when lightning hits the ground or a power line near your home, it induces a voltage spike that races along the cabling into every connected device. A strike up to a kilometre away can destroy an inverter and batteries, often with no visible mark on the roof at all. The panels themselves are the tough part of the system; the inverter is the sensitive, expensive component a surge takes out.
South Africa makes this a bigger deal than most places. The country has one of the highest lightning ground-flash densities in the world, per DEHN Africa and Engineering News (checked October 2026), and on the Highveld and across KwaZulu-Natal a summer afternoon storm is the season, not a rare event. That is why earthing and surge protection are treated as standard here, not optional extras-and why skipping them is its own entry in this guide (see Mistake 11).
What a Compliant Lightning Setup Includes
- Bonded earthing: panel frames, mounting rails and inverter tied into your home's earth, so surge current has a safe path to ground
- DC-side surge protection device: between the panels and the inverter
- AC-side surge protection device: at or near the distribution board
- Type 1 or combined Type 1 and Type 2 devices where lightning risk is high-which in most of South Africa it is
Two details installers rarely volunteer. First, surge protection devices wear out: they degrade with age and after absorbing surges, so they are a part to check, especially after a severe storm season-not fit and forget. Second, a surge device with poor earthing is close to useless, which is why the earthing in Mistake 11 matters more than the brand of device. Set against replacing an inverter at R15,000-R45,000 or a battery at R25,000-R70,000 (EnergyBee working ranges, October 2026), the protection is the cheapest part of the job.
The insurance angle catches people out too. Buildings policies cover fire, storm, lightning and surge, but many insurers require the system declared and the sum insured raised to include its replacement cost-or the claim is only partly paid under an under-insurance penalty. No CoC, or earthing done badly, is a common reason a claim is declined (see the permits and compliance guide for what the paperwork should include). Keep the CoC on file and check how your policy words power surge separately from a direct strike.
Will Hail Damage Your Solar Panels?
Quality panels are built for hail, and the hail in most South African storms simply bounces off. Tier-1 panels carry IEC 61215 certification, which means surviving 25mm ice balls fired at 23 m/s-about 83km/h-at eleven points on the panel with no meaningful power loss, behind 3.2mm to 4mm of tempered glass on an aluminium frame (general 2026 guidance for quality residential panels, verified October 2026). The risk only climbs when the stones get properly big:
Hailstone Size vs a Tier-1 Panel
- Up to 25mm (pea to small marble): passes the IEC 61215 test-no damage
- 25mm-35mm (marble to R5 coin): almost always fine; the glass is tempered for it
- 35mm-50mm (golf ball): risk of cracks on a direct hit; often still survives
- 50mm and up (egg or bigger): can shatter glass-rare, and this is what insurance is for
Most Highveld homes go year after year through ordinary summer hailstorms with zero panel damage, because the stones that fall are mostly under 25mm and certified panels are built for exactly that. The real hail risk is not the weather-it is cheap, uncertified panels. No IEC 61215 rating means no promise about hail, which is one more reason the component quality in Mistake 9 matters. Our panel brand and tier guide shows how to tell certified stock from rebranded no-names.
Two follow-on points worth knowing. After a genuinely bad storm, check your monitoring app: a panel or string suddenly producing less is the first clue, and severe hail can leave hairline micro-cracks you cannot see that slowly cut output-so it is worth a professional inspection if a monster storm hit your roof. And skip the mesh hail guards and covers: they shade the panels and cut your output, they are fiddly to fit before every storm, and most installers do not recommend them for normal residential roofs. Certified glass, a signed-off install and proper insurance beat a tarp every time.
How Often Should Solar Panels Be Cleaned? A Province-by-Province Schedule
It depends on where you live and when your dry season falls. Dirt and dust typically cost a solar system 3 to 5% of its yearly output, per the IEA's solar research programme. Rain does most of the cleaning for you: a Stellenbosch University study in the Northern Cape Karoo found that about 6mm of rain every four to six weeks kept uncleaned panels within 1% of cleaned ones. So what decides your schedule is how long your dry season lasts, and how much dust blows around during it. Most of the country gets its rain in summer (roughly October to March), which makes May to September the dirty season-exactly when the Western Cape is drying out instead.
Cleaning Frequency by Province
- Gauteng, Free State, North West, Limpopo and Mpumalanga Highveld: every 2 to 3 months from May to September, and usually not at all in summer. Parts of Gauteng and Mpumalanga fall in the Highveld Priority Area, where dust levels peak in winter, and the Free State deserves an extra clean after a dust storm
- North West near the platinum mines: more often than the standard schedule-mining produces over 70% of the dust in the Waterberg-Bojanala Priority Area, per the area's air quality baseline assessment
- Mpumalanga Lowveld (around Mbombela): once at the end of the dry season
- Western Cape: every 2 to 3 months from November to March; winter rain does the job from May to August
- Northern Cape: every 2 to 3 months all year, especially May to October-the driest province in the country
- Eastern Cape and KwaZulu-Natal: on the coast, once a year is enough, plus a rinse if you live right by the sea, where salt spray is the bigger problem; inland, clean once at the end of the dry winter
Doing it yourself is the cheap option almost everywhere: a soft brush or cloth and some water does the job in most areas. It works less well near mines and bare farmland, where grit builds up faster, and that is where a professional clean earns its fee. Nobody regulates cleaning prices, so each company sets its own-usually a per-panel rate plus a call-out fee. In Gauteng, listed 2026 rates run R35 a panel plus a call-out (per Solar Panel Cleaner) or from R350 for a system of up to 10 panels (per Handyman Pretoria); in Cape Town, R100 a panel with a R2,500 minimum call-out (per First Energy).
What skipping it costs: a 4 kW system in Johannesburg produces about 6,900 kWh a year (per PVGIS), so a 3 to 5% soiling loss is roughly 210 to 350 kWh-about R740 to R1,230 a year in lost savings at Eskom's 2026/27 Homepower rate of about R3.56 per kWh including VAT. Whatever your province, time the clean for the end of your dry season, when the dust has done its worst and the first good rains are still weeks away.
Questions to Ask Your Installer Before Work Begins
Protect yourself by asking these critical questions before signing any contract or making deposits:
Essential Pre-Installation Questions
1. Qualifications & Credentials
- • What is your electrical registration number? (Verify online)
- • Are you a SAPVIA member? What manufacturer accreditations do you hold?
- • Can you provide proof of public liability and professional indemnity insurance?
- • How many similar installations have you completed in the past 12 months?
2. Structural & Technical
- • Will you conduct a structural assessment of my roof? By whom?
- • What waterproofing methods will you use for my specific roof type?
- • How will you handle shading analysis and optimal panel placement?
- • What mounting system brand will you use? Is it rated for our wind zone?
3. Components & Quality
- • What exact brands and models of panels, inverter, and batteries are included?
- • Are these Tier 1 components? Can you provide datasheets?
- • What warranties come with each component? Who handles warranty claims?
- • Will you provide a separate waterproofing warranty?
4. Installation Process
- • How long will installation take? What is the day-by-day schedule?
- • Who will actually do the installation? Can I meet them?
- • What safety measures and site protection will you implement?
- • How will you handle municipal approvals and grid compliance?
5. Compliance & Documentation
- • Is Certificate of Compliance included? When will I receive it?
- • What testing and commissioning will you perform?
- • What documentation will I receive (manuals, warranties, diagrams)?
- • Do you handle municipal registration, or is that my responsibility?
6. Post-Installation Support
- • What training will you provide on system operation?
- • What post-installation support do you offer? For how long?
- • How do I contact you for warranty claims or technical issues?
- • Do you offer maintenance plans or annual inspections?
Red Flag Responses: If an installer becomes defensive, can't answer technical questions, or says "don't worry about those details," walk away. Professional installers welcome detailed questions and provide thorough, documented answers.
Final Recommendations
Avoiding these 15 common mistakes requires diligence, but the investment is worth it. A properly installed rooftop solar system will serve you reliably for 25+ years, providing energy independence, load shedding protection, and substantial savings.
The key is choosing quality over price, verifying credentials and qualifications, demanding proper documentation, and not accepting shortcuts. South Africa's solar market has matured significantly-there are excellent installers who do things right. Your job is to find them.
Use our resources to guide your journey:
- Complete rooftop solar installation guide for step-by-step planning
- Rooftop solar installation costs to understand fair pricing
- Installer selection guide for checking qualified professionals
- Solar panel installation guide for technical details
Remember: The most expensive solar system is the one installed incorrectly. Invest in quality installation from the start, and your system will reward you with decades of reliable, clean energy.
About This Guide
This guide is based on analysis of over 2,000 South African solar installations, interviews with 50+ professional installers, and documentation of hundreds of installation failures. Our team includes electrical engineers, solar industry veterans, and homeowners who've experienced both excellent and poor installations.
We update this guide quarterly to reflect evolving best practices, new regulations, and emerging installation technologies. Last updated: November 2026.